123FormBuilder Knowledge Base
Search our documentation platform for answers, service specifications and 3rd-party integrations.
Everything there is to know about the My Forms section
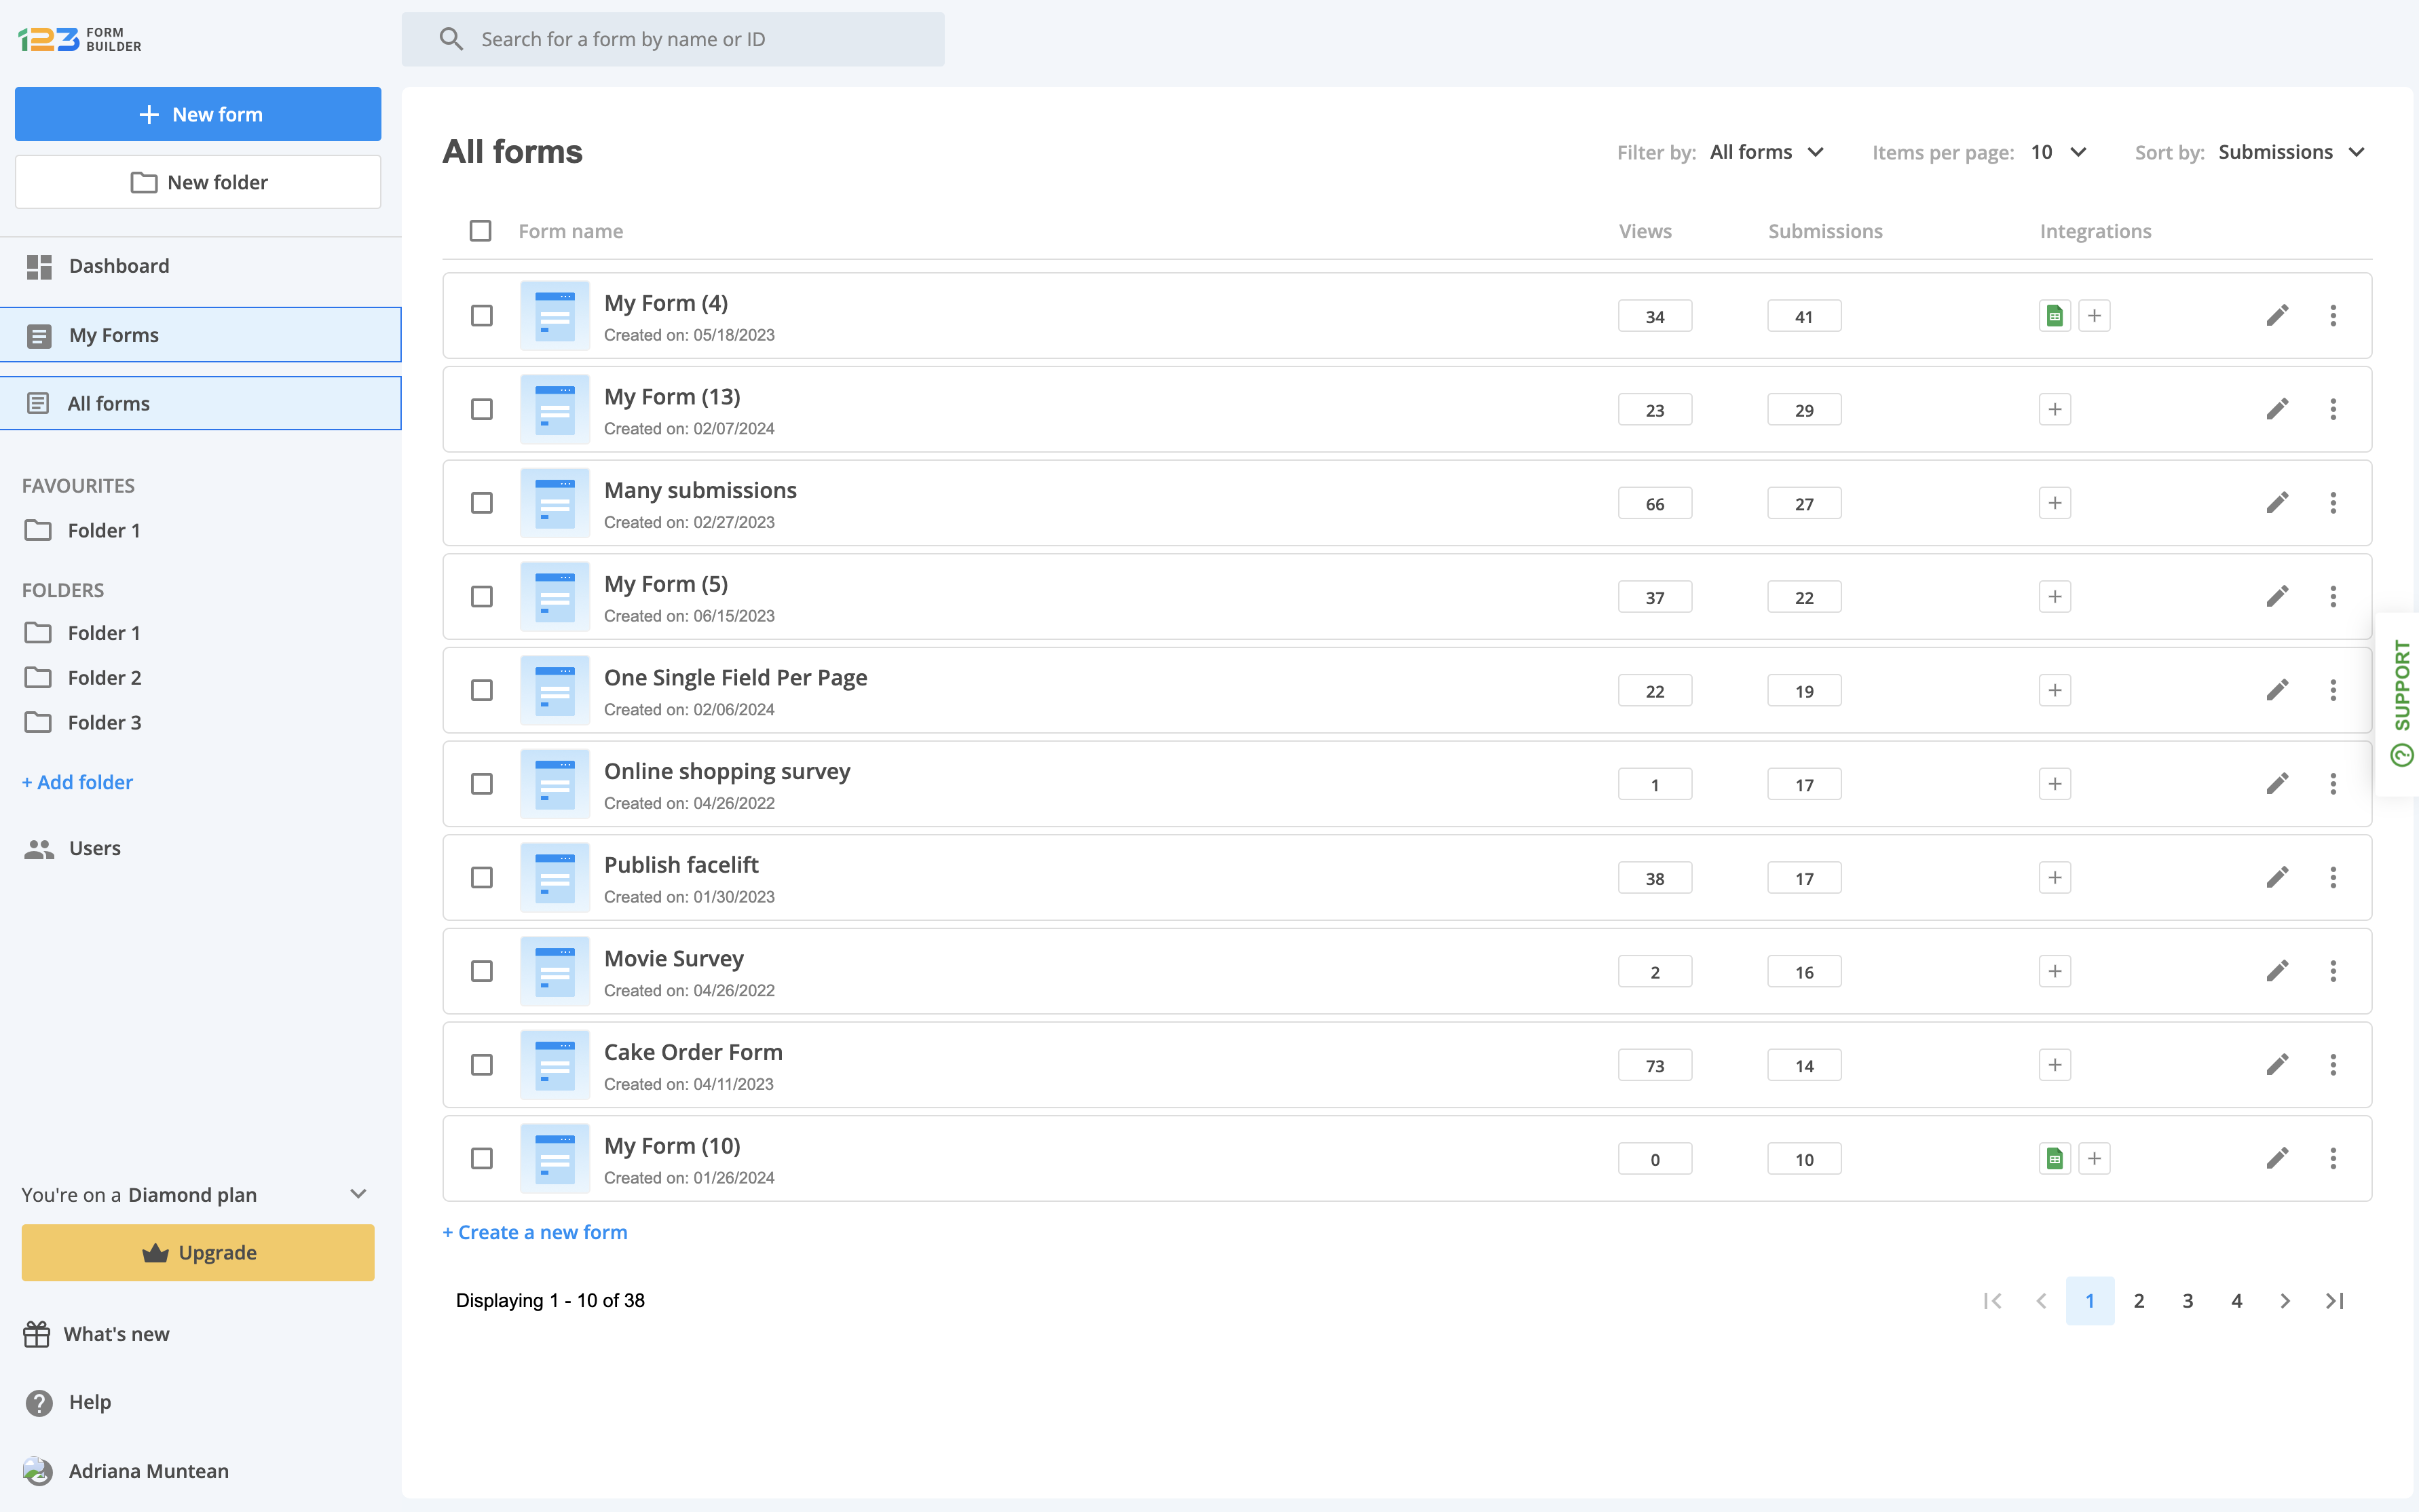
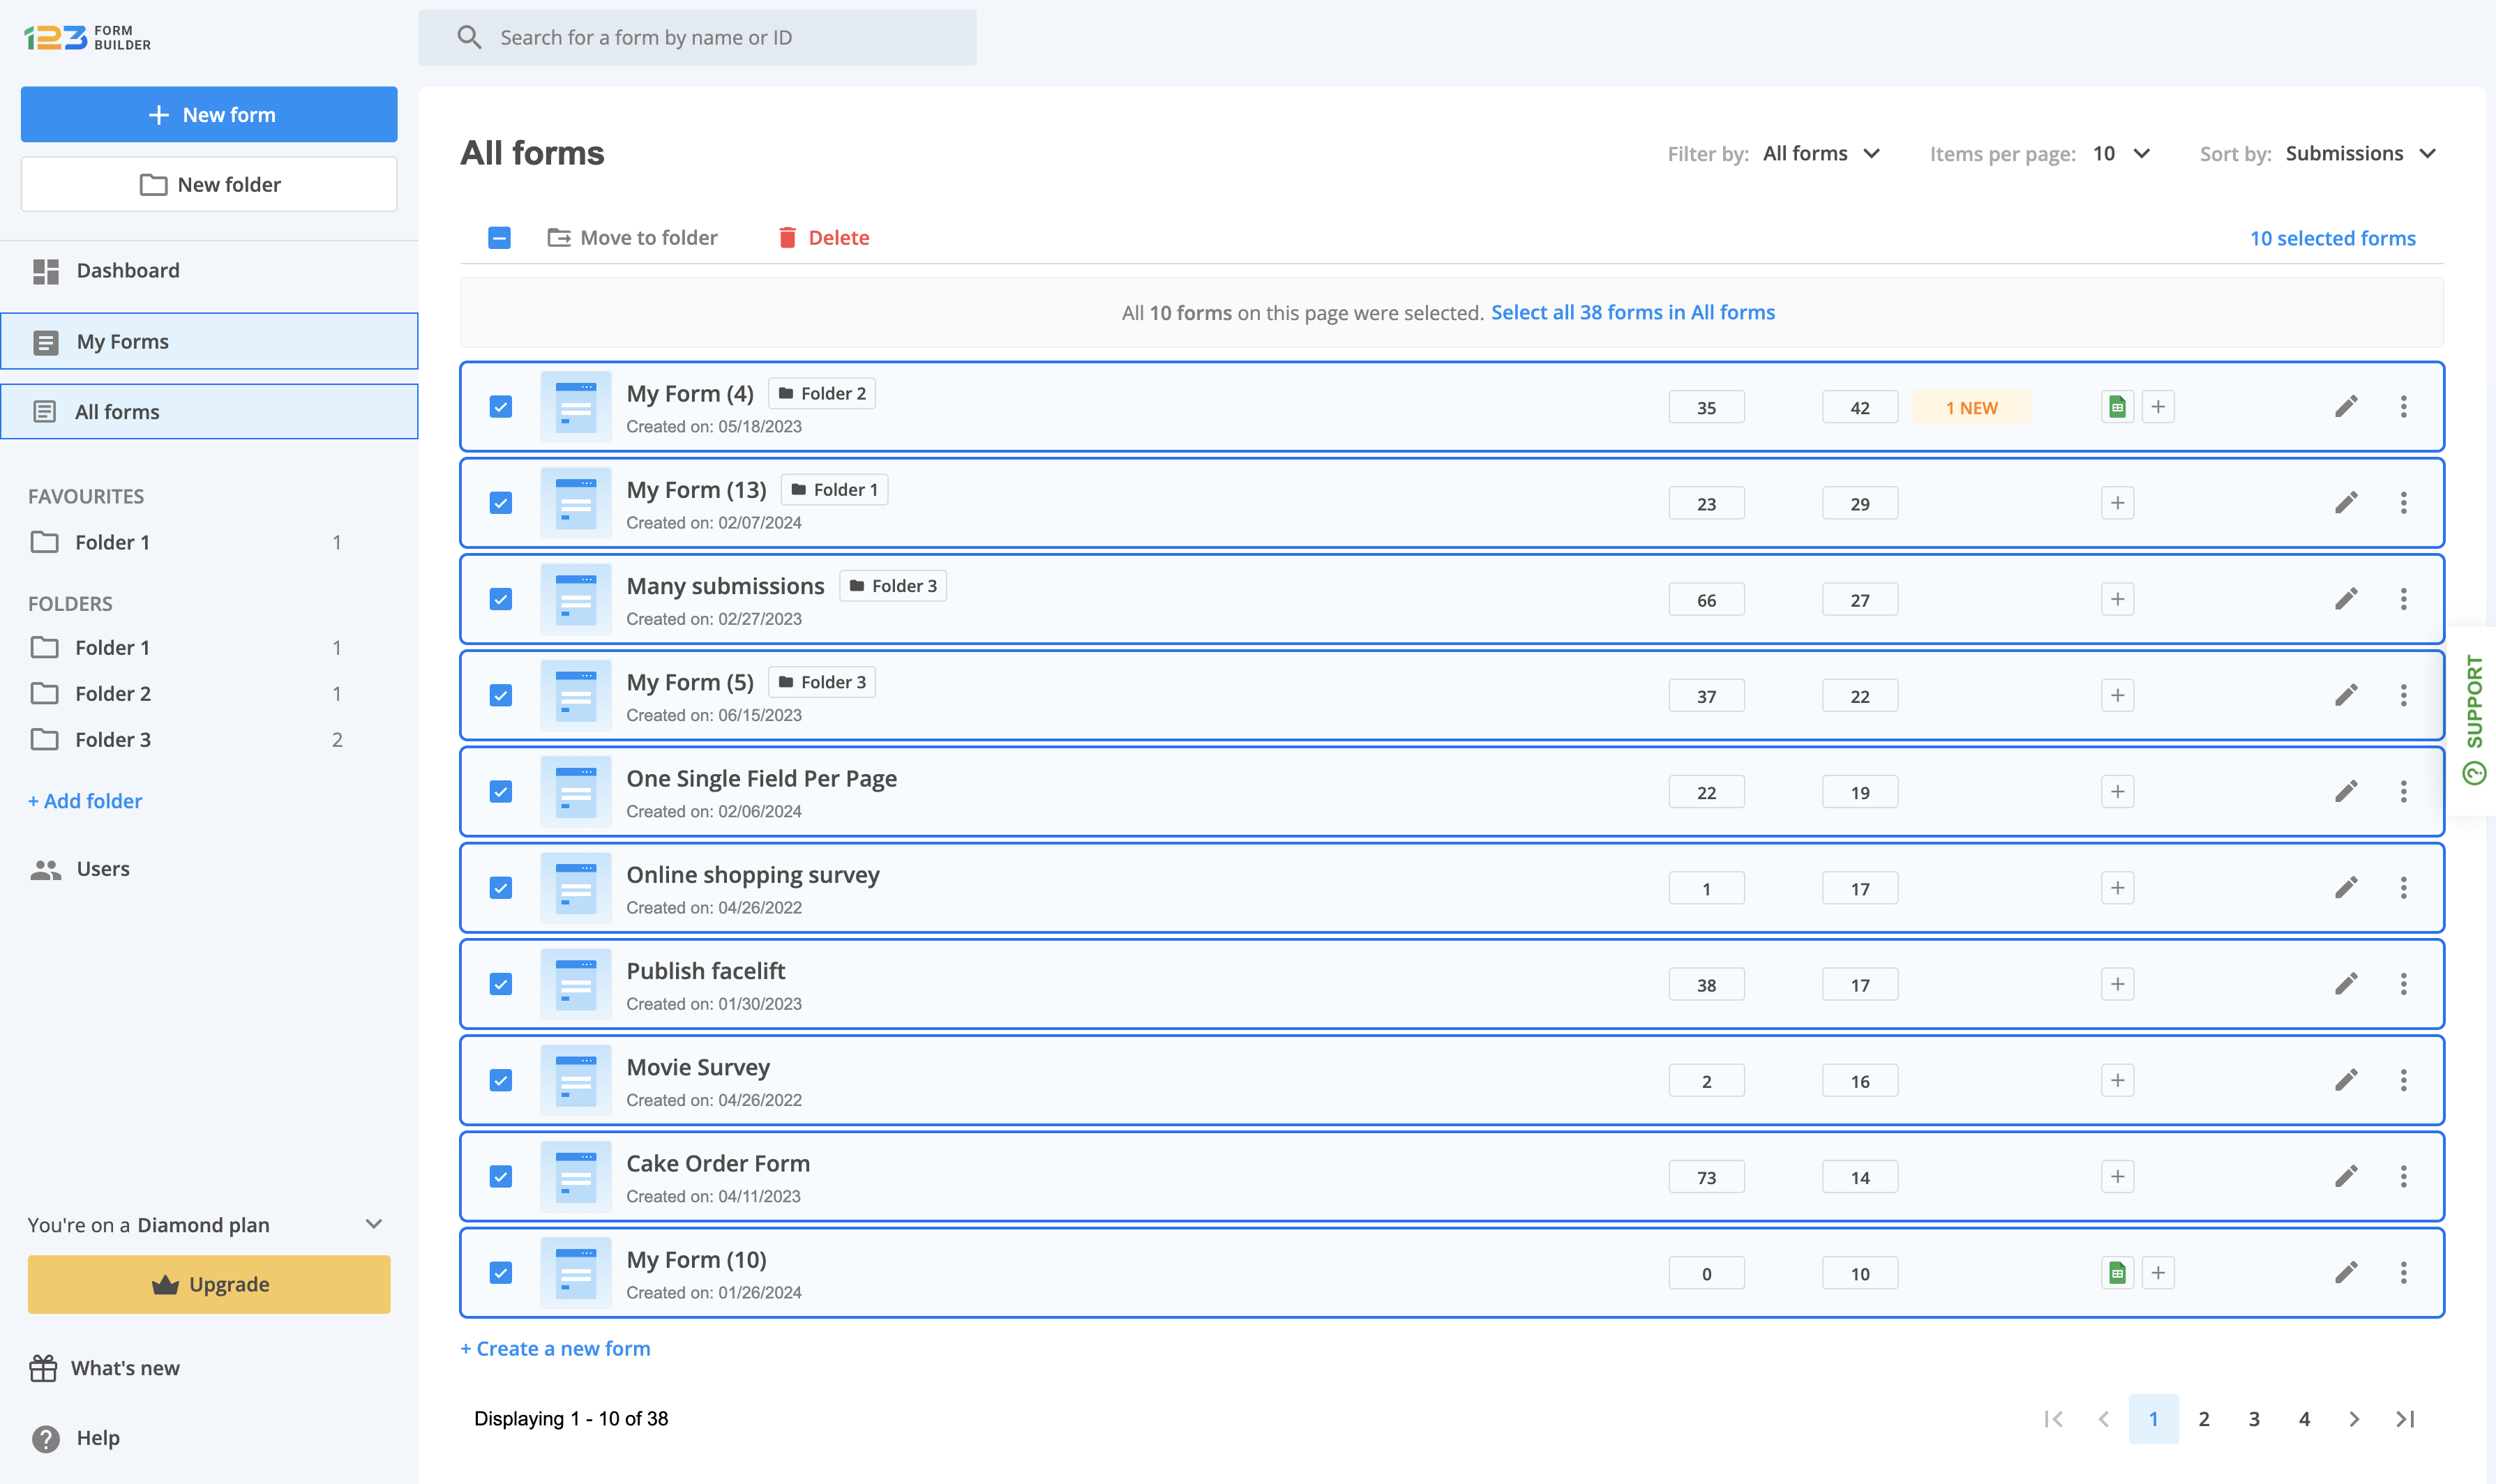
My Forms acts as a section within the product where you can view all the forms that are stored in your account. In All forms, you’ll notice all the forms you have ever created, regardless of the folders they are part of.
Let’s take each section one by one and dive into details.
Left side panel
On the left side of the page, you’ll notice at the top two buttons: New form & New folder. You can easily create a new form by clicking on New form button. For a better management of your forms, you can create a new folder by clicking on New folder button.
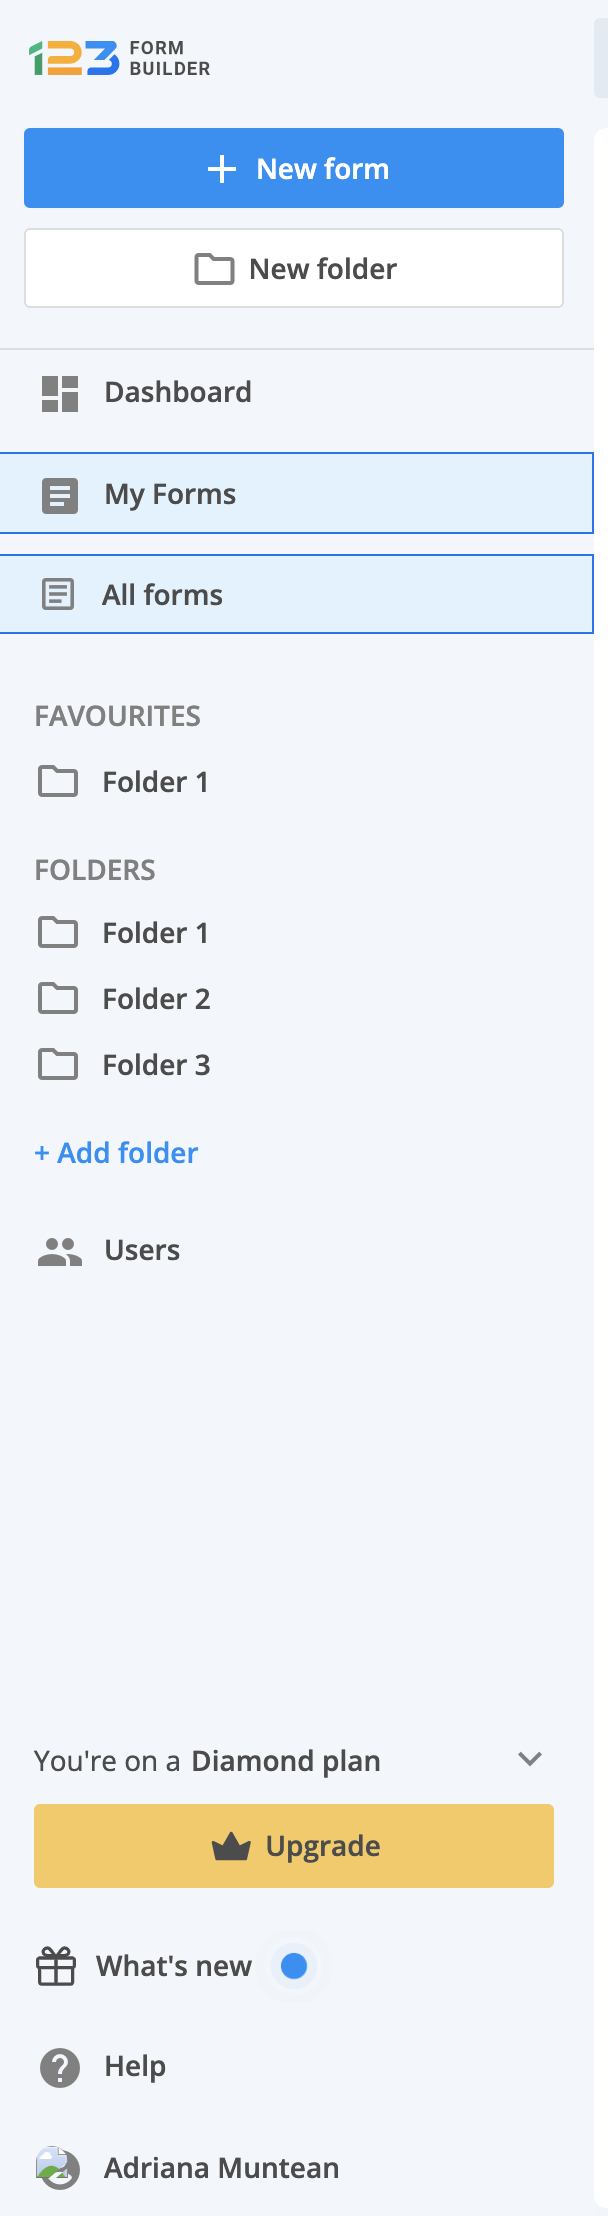
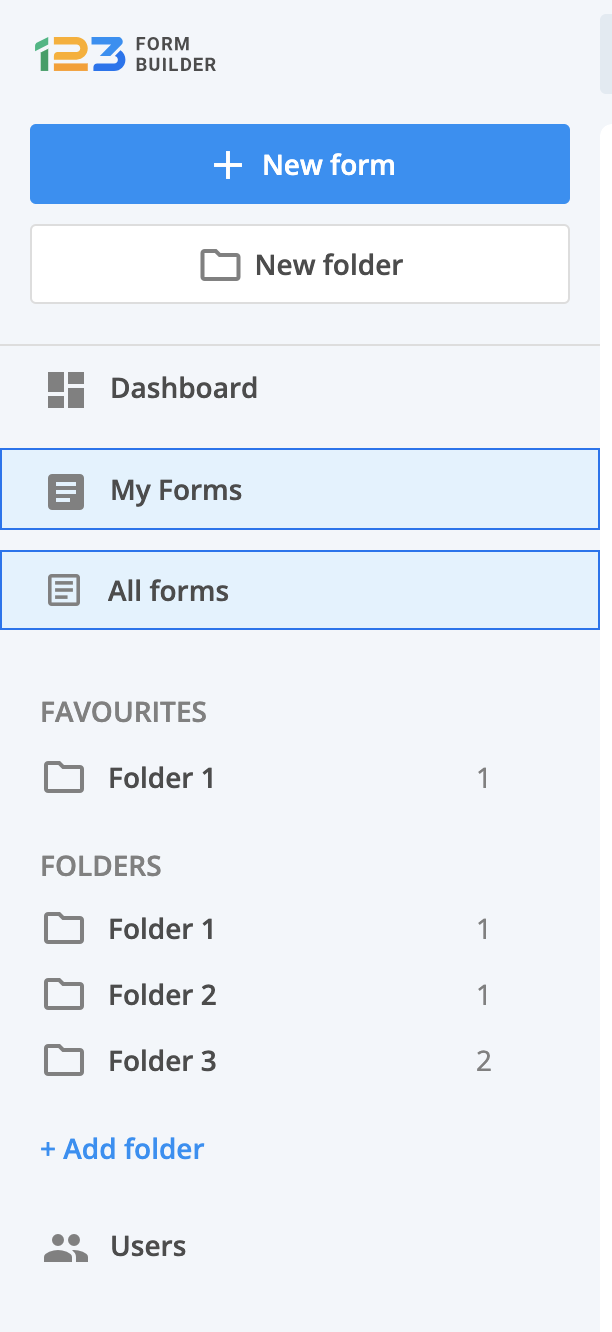
Going down the left side panel, a new section is available, called FAVOURITES. This is displayed only if you have marked a folder as favorite, but we will come back later to that.
Under FOLDERS section, we are displaying all the folders you have created. When you have multiple forms within a folder, we are displaying a counter near the folder name so you could easily scan how many forms there are in a folder.
USERS section is for managing all the users & subusers of your account. More details on this can be found here.
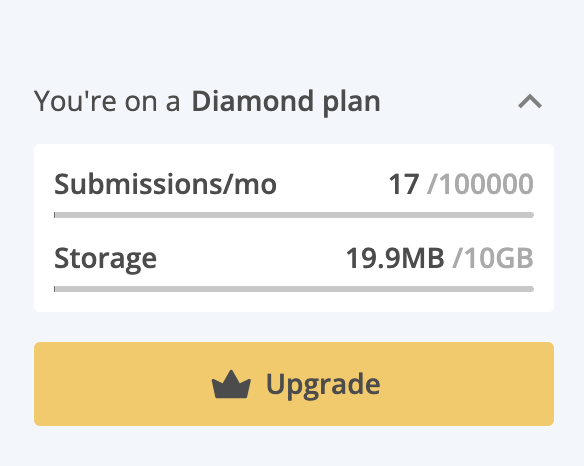
Pricing limits
By default, the pricing limit section is collapsed, but you can expand it by clicking on the arrow icon in order to see the limits according to your pricing plan.
What’s new
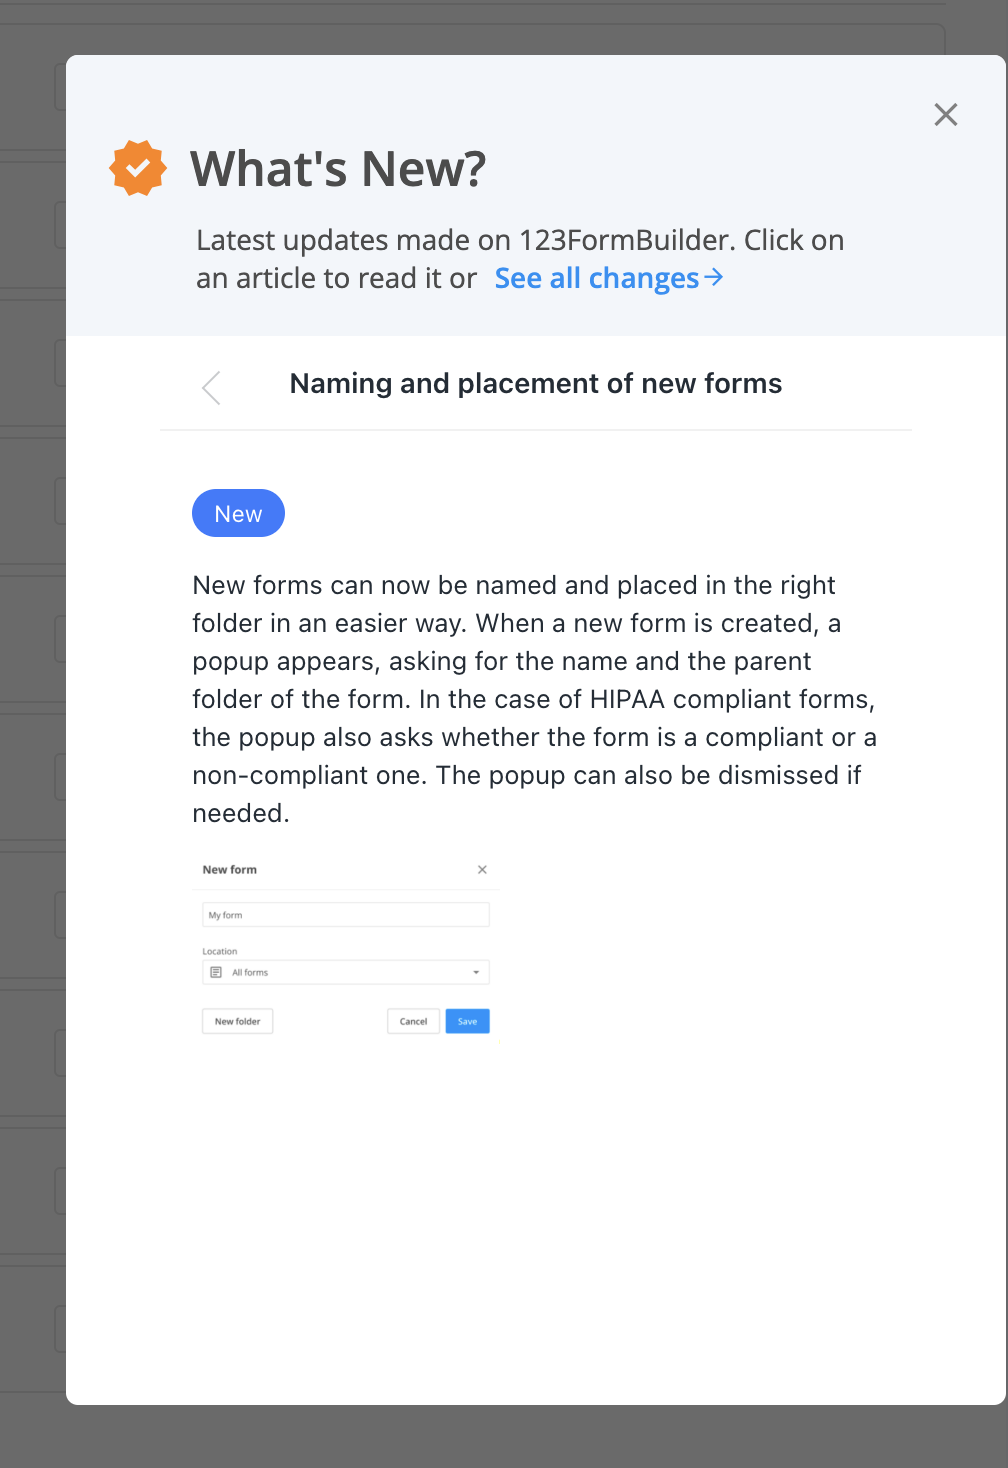
We are constantly working on improving the product in order to provide you with better services. If you want to keep an eye on what we have been working on lately, you can click on What’s new.
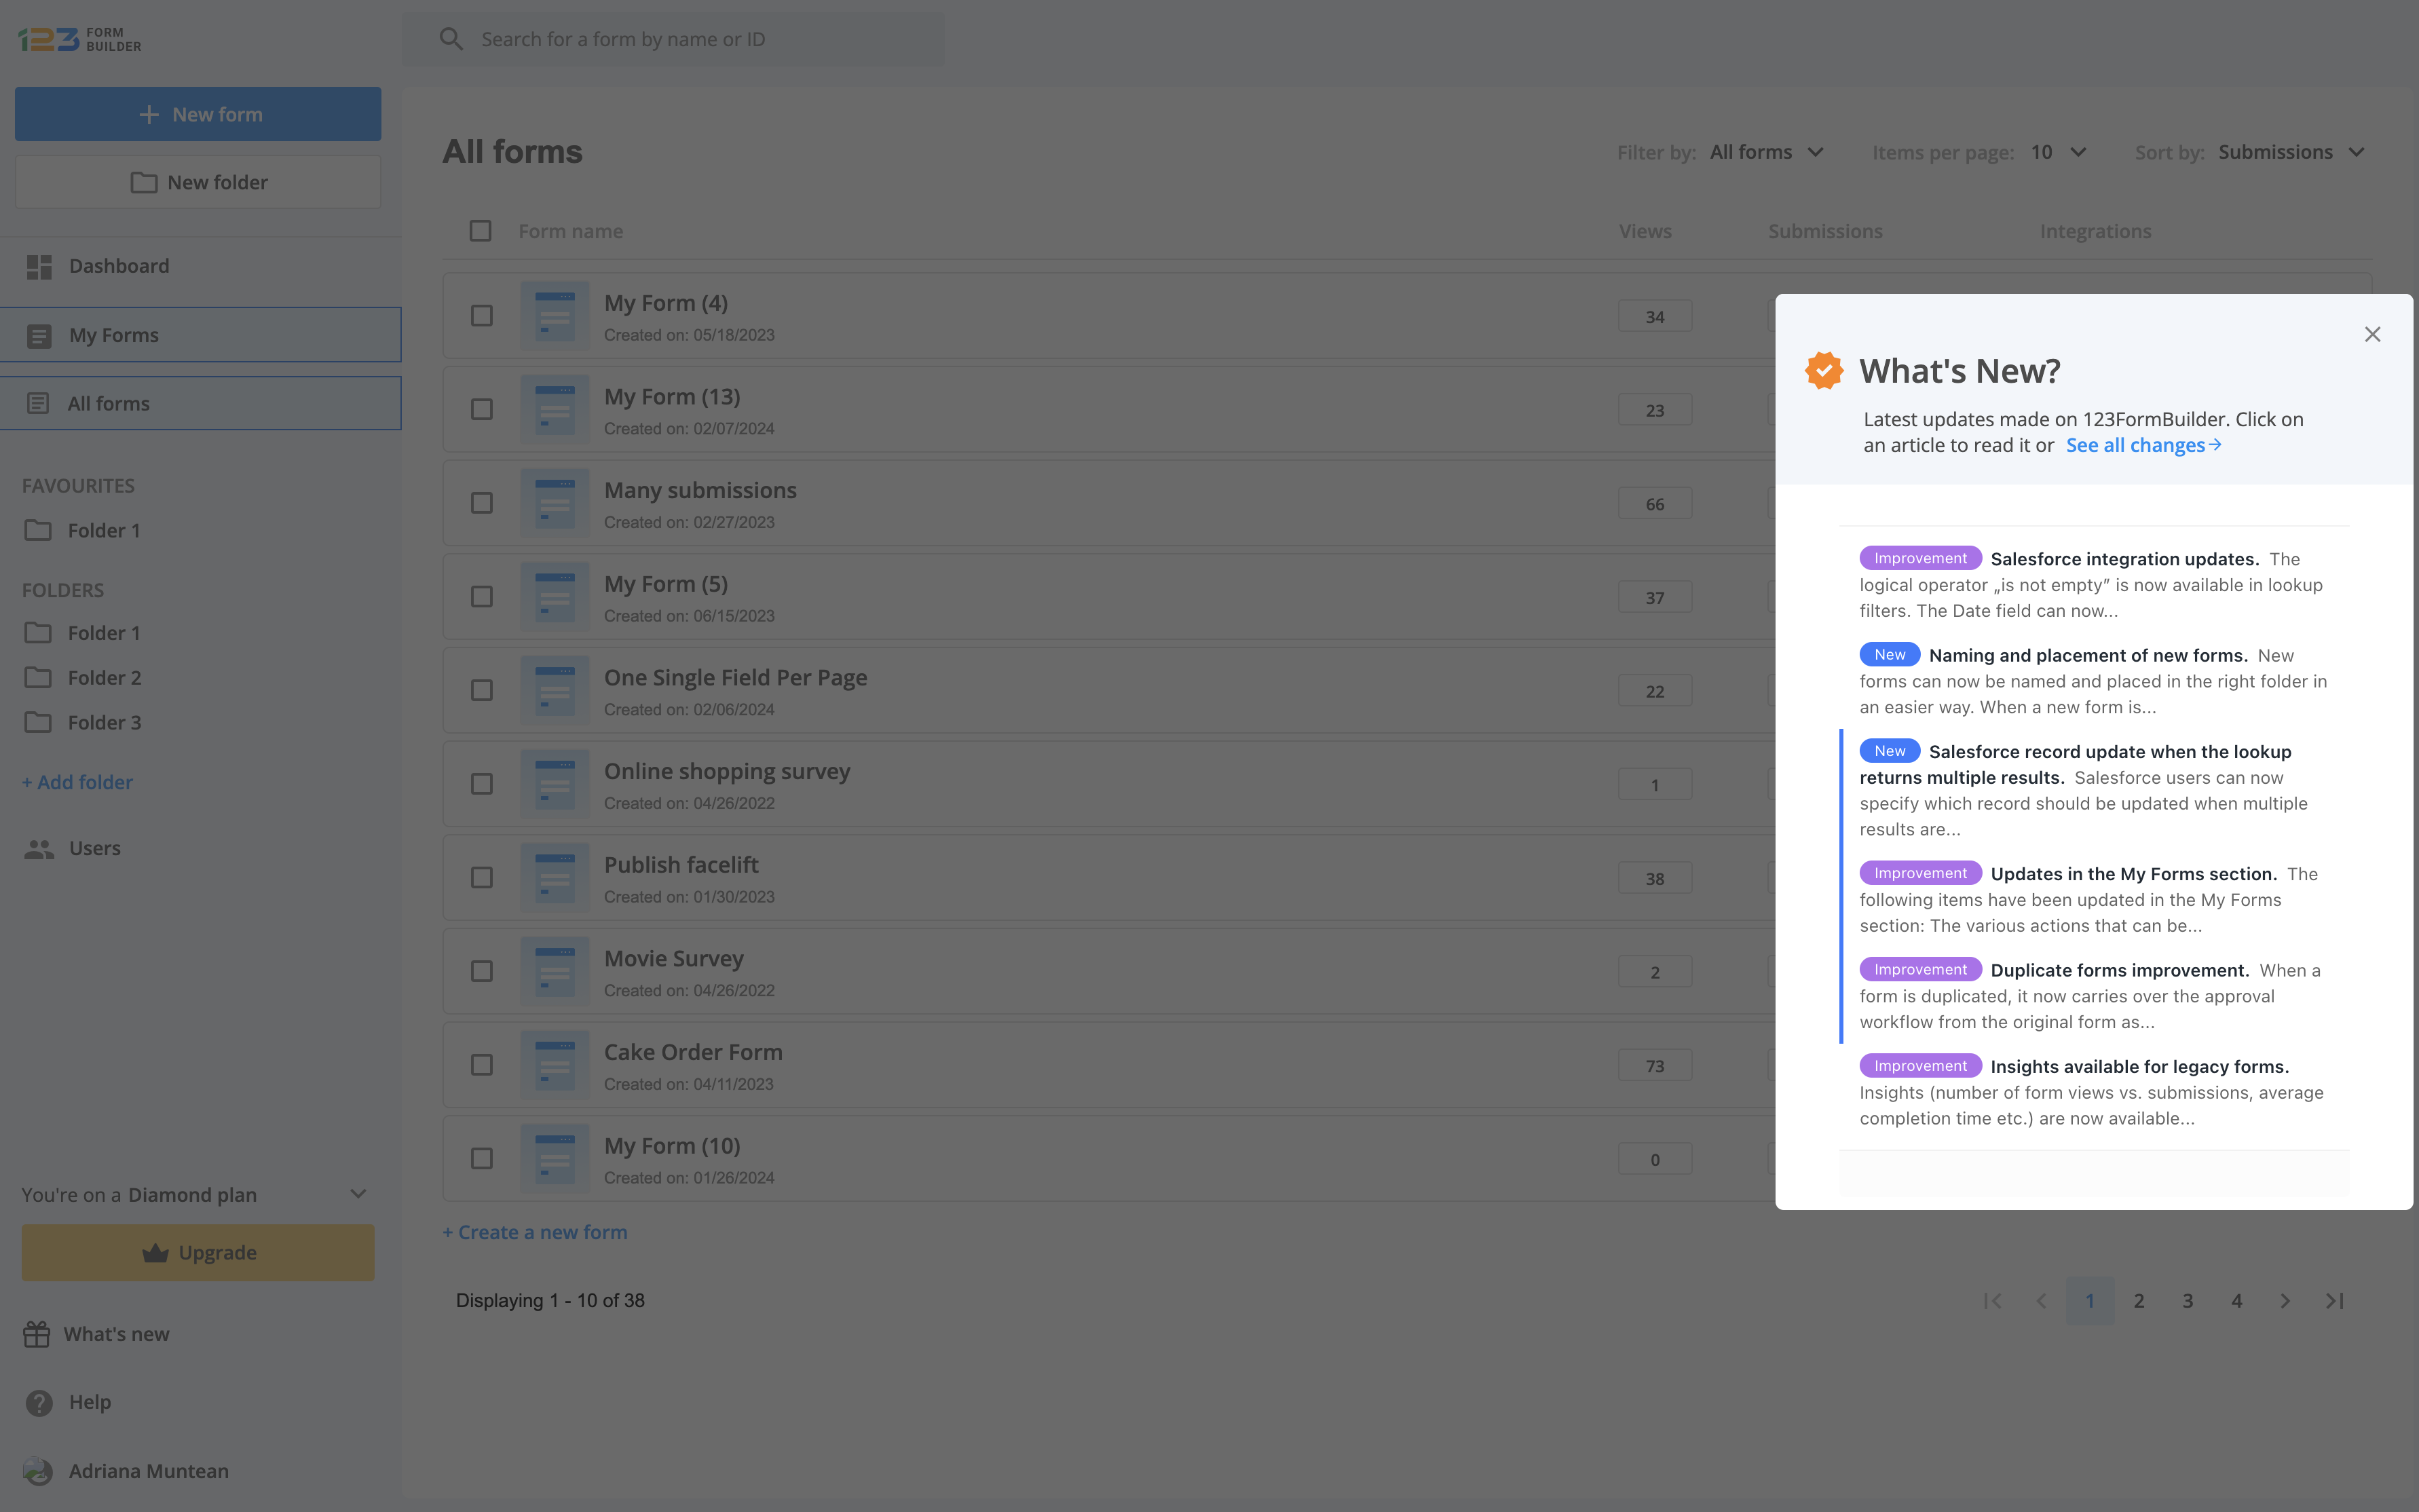
Once What’s new is clicked, a modal is opened on the right side where you can check the latest updates. You can see all the changes we have been working on by clicking on See all changes. Also, by clicking on the update title, more info is going to be displayed about that release.
Forms table
Under the forms table, we are displaying all the forms and some details about each of them. You can customize the view by applying filters, choosing how many items you want to view and you can also sort by different criteria.
Filter by
You can filter the view by having all the forms displayed or by having only the unfiled forms displayed. An unfiled form is a form that is not part of a folder.

Items per page
You can choose how many forms you want to have displayed on a single page. By default, we are displaying 10 forms.

Sort by
You can sort your forms by different criteria. When sorting by submissions, we are displaying the forms in descending order by taking into consideration the total number of submissions.
When sorting by oldest/newest, we are taking into consideration the creation date of the form. When sorting by name, we are displaying the forms in alphabetical order.

Form information
For each form, we are displaying some quick information so you could easily scan the form & its performance.
Next to the title of the form, we are displaying a tag with the folder name. This appears only when a form is part of a folder. By clicking on the folder name, you are redirected to the folder where we are displaying all the forms that are part of that folder.
Under the title of the form, you can find the date when the form was created.
Under the Views column, we are displaying the total number of views the form has gathered. By clicking on the views number, you are redirected to the Insights section of the form.
Under the Submissions column, we are displaying the total number of submissions your form has gathered. By clicking on the submissions number, you are redirected to the Submissions section of the form. If your form has gathered submissions in the last 24 hours, the total number of submissions gathered in the last 24 hours is displayed in an orange container.
Under the Integrations column, we are displaying the enabled integrations on your form. For example, in the below example, we have Google Sheets integration enabled. By clicking on the Google Sheets icon, you are redirected to the Integrations section. If you don’t have an enabled integration, you can quickly navigate to Integrations in order to add one by clicking on the plus sign.

You can open up the form/edit the form by clicking on the entire form row or by clicking on the pen icon.
Overflow menu
Each form has additional options that can be checked by clicking on the dotted menu to the right side of the form.
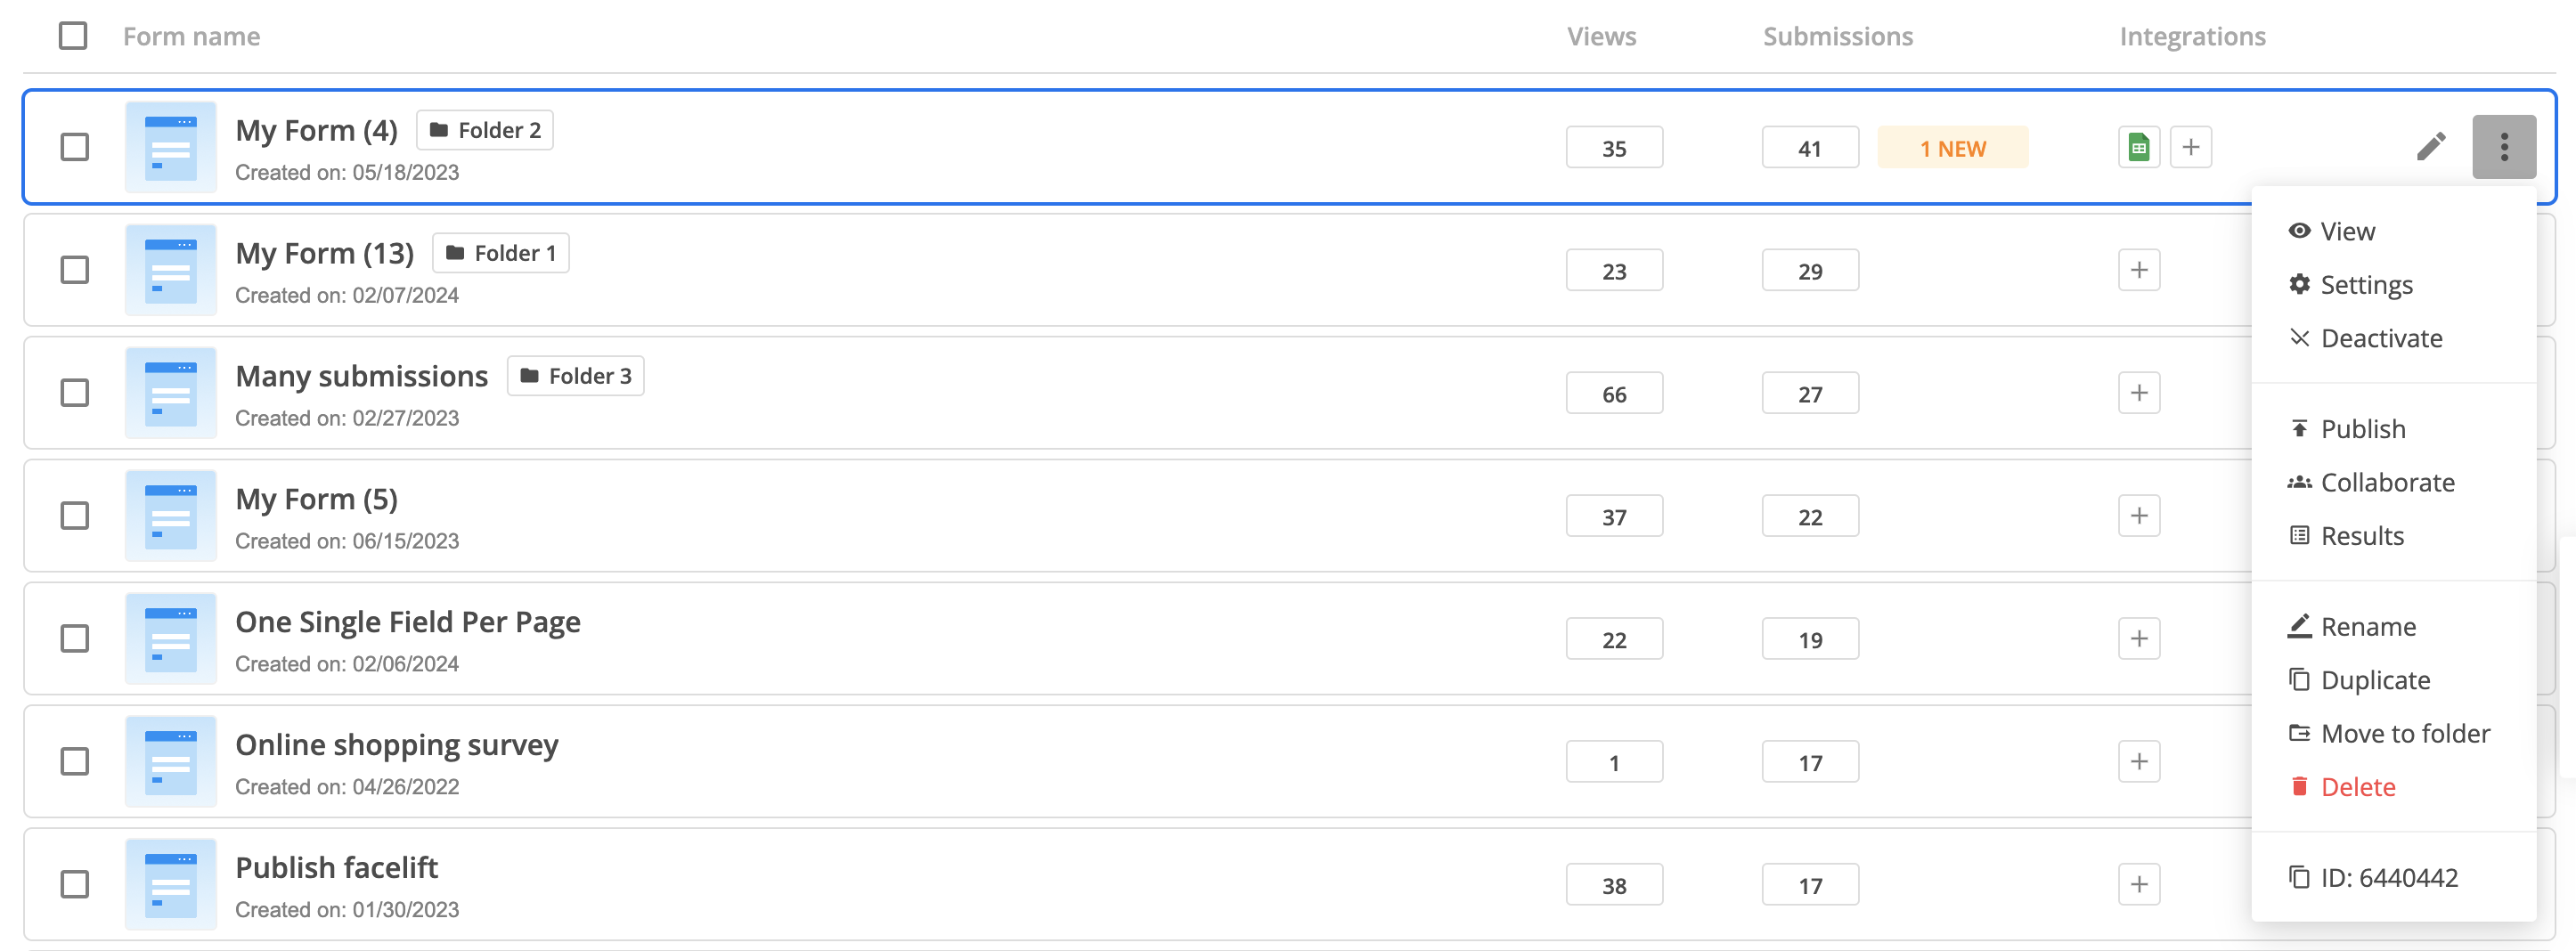
View – used if you want to open up the form within a new tab
Settings – by clicking on Settings, you will be redirected to the Set up section of the form.
Deactivate – this acts as a quick way of activating/deactivating your form. For more options regarding the schedule of your form, please check Schedule section. More info about it can be found here.
Publish – used if you want to quickly navigate to the Publish section.
Collaborate – this option is used if you have subusers on your account. From here you can set permissions to whom can view/edit your form.
Results – used if you want to quickly navigate to the Reports section.
Rename – used if you want to rename your form.
Duplicate – used if you want to duplicate a form with all its settings so that you wouldn’t start the work on a new form from scratch.
Move to folder – you can move a form to a folder by using this option.
Delete – option used to delete your form.
ID – here you can find the ID of your form. This is meant to help you easily identify your form. By clicking on it, you copy the ID to your clipboard.
Quick action buttons
When selecting a form or multiple forms, you’ll notice 2 quick action buttons at the top of the form table: Move to folder & Delete. You can easily move multiple forms to a folder at once, or even delete them.
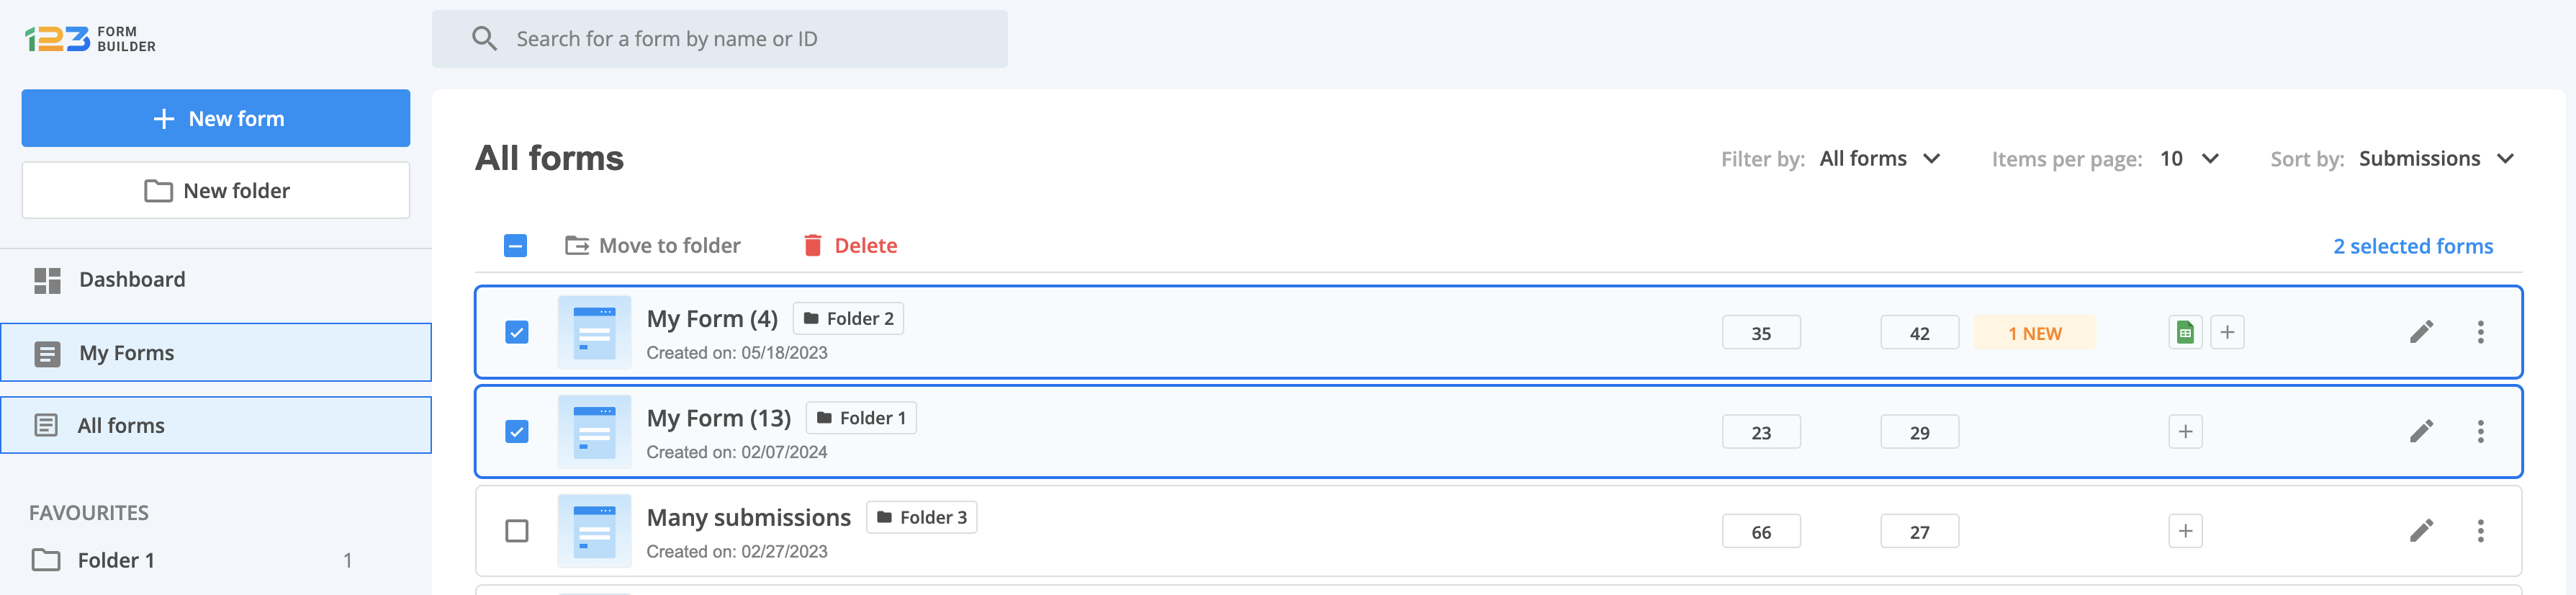
When selecting all forms from the page, a banner will be displayed informing you that all X forms from the page were selected. You can select all the forms within your account by simply clicking on Select all X forms.
Related articles
9 comments
Leave a Reply
Similar Articles
Frequently Asked Questions
Here is a list of the most frequently asked questions. For more FAQs, please browse through the FAQs page.
How can a form be reset or refreshed on my WIX website if a user should change their mind about submitting? Also, how can multiple options be selected on a checkbox field
Hello Mary!
I apologize for the late reply. You can add a reset button on the form that will bring the form to its original state once it’s pressed by the form visitor. In the Form Editor, click on the Send button below the form layout. Afterwards, hover over the Edit Field panel on the left and tick the Show Reset Button box. This will add a new button next to the submit (send) button on the form.
Regarding your second question, the Checkbox field is a multiple selection field. This means the form visitors can check up to all the available choices you have added to the field.
For further assistance, don’t hesitate to contact our Support Team at support@123formbuilder.com or via our contact form.
Thanks!
спасибо, всё получилось!))) :*
How can I share a form with another administrator? (from the same package)
Thank you!
Hello Miriam!
In the Users section you can set up certain levels of permission to your subaccounts. There, you read more on how you can share forms with the subusers of your account. You can share forms or only sections of the forms. Follow our article on how to set up Access Levels and Permissions for web forms?.
For questions or assistance, please don’t hesitate to contact our Support Team at support@123formbuilder.com
Thanks!
Do you have a Drop Down Menu or Multiple Answer?
Thanks.
Como configuro o formulário para o blog?